


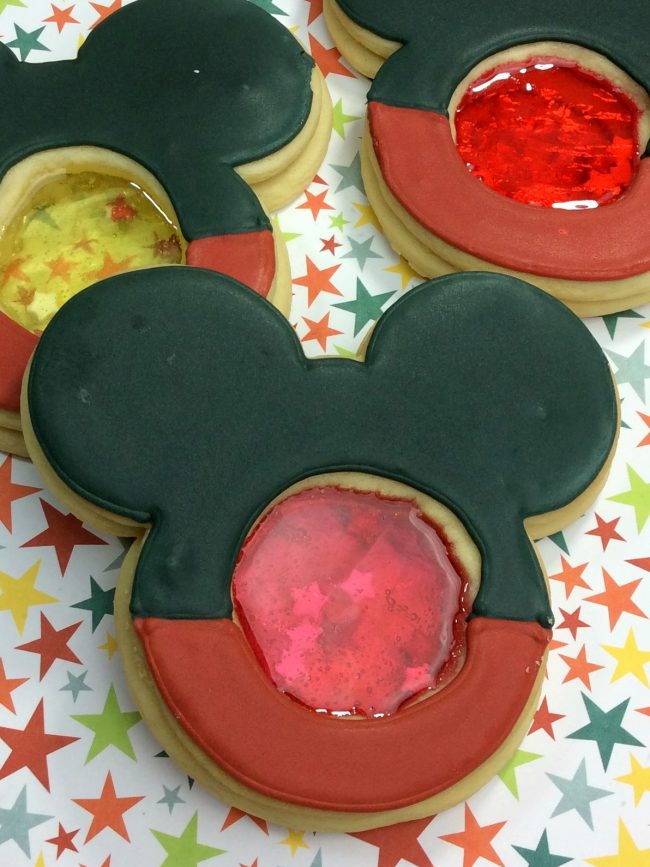
Ok so I know these instructions on the Mickey Mouse Stained Glass Cookies look long but its just several kinds of different steps. You have the cookie steps, the icing steps, and then the decorating. Seriously these cookies look amazing and they would be perfect for any type of party!
MICKEY MOUSE Stained Glass Cookies
makes 2 1/2 dozen
Cookie Ingredients:
3 C flour
1 tsp baking soda
1/2 tsp salt
1 C soft unsalted butter
1 C granulated sugar
1 eggs
1 tsp vanilla
1 bag of Jolly Ranchers, separating the red and yellow to use in the cookies
1 tablespoon to use to outline the opening circle
Patriotic star sprinkles
Cookie Cutter: mickey mouse head
Cookie Directions:
– Cream the soft butter with the sugar until the combination is smooth not grainy to the touch in a mixing bowl.
-Add eggs…Continue to mix.
-Add the vanilla.. Continue mixing.
-Sift the four, baking soda, and salt together.
-Add the dry mixture to the wet mixture.
-Continue mixing to make sure all ingredients are thoroughly blended.
-Make the dough into a ball, wrap it in cling wrap completely covering the entire dough ball.
-Put in the refrigerator for about 6 hours or overnight. Check to see if the dough is firm.
-Preheat oven to 325 degrees.
-Pull the cookie dough out of the refrigerator and sit it out to soften up a bit.
– Put flour out on the cutting board, rub flour on the rolling pin, and work some flour into
the batter. (if needed).
-Roll the dough out on the cutting board and using the cookie cutter begin to make your cookies.
-Line the cookie sheet with parchment paper.
-Using a metal spatula move the cut cookies to the parchment lined cookiesheet.
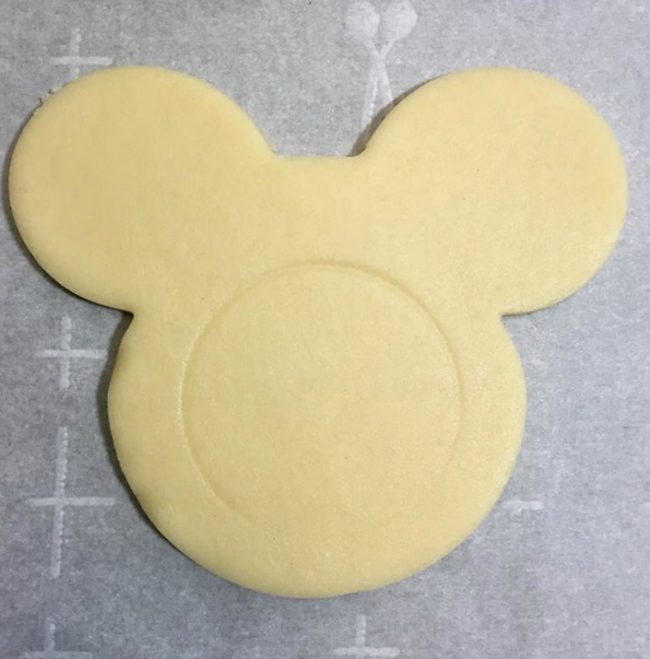
-Take a 1 TBSP and use it to get your outline of the center circle.
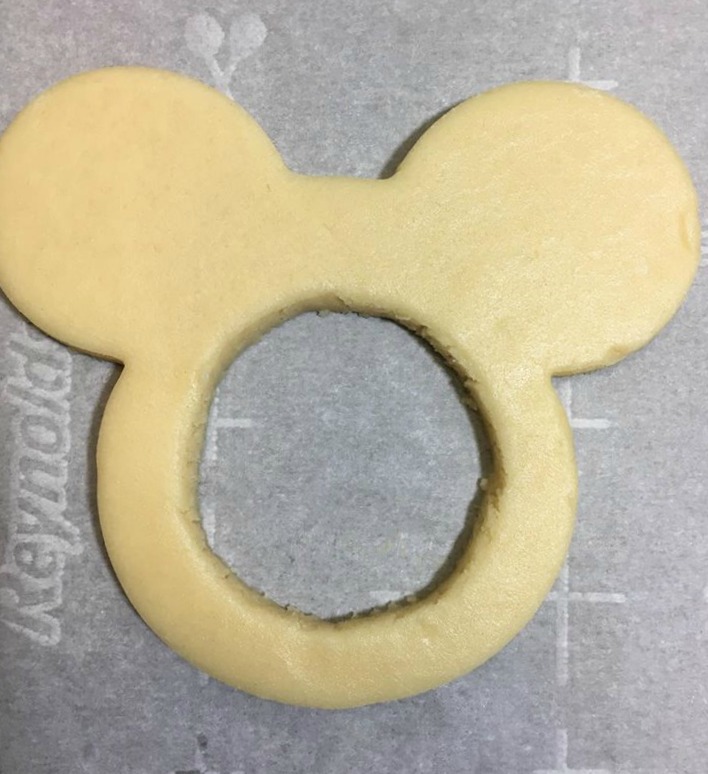
-cut out the circle.
-Place the cookies on the baking sheet and bake at 325 degrees for 6 minutes.
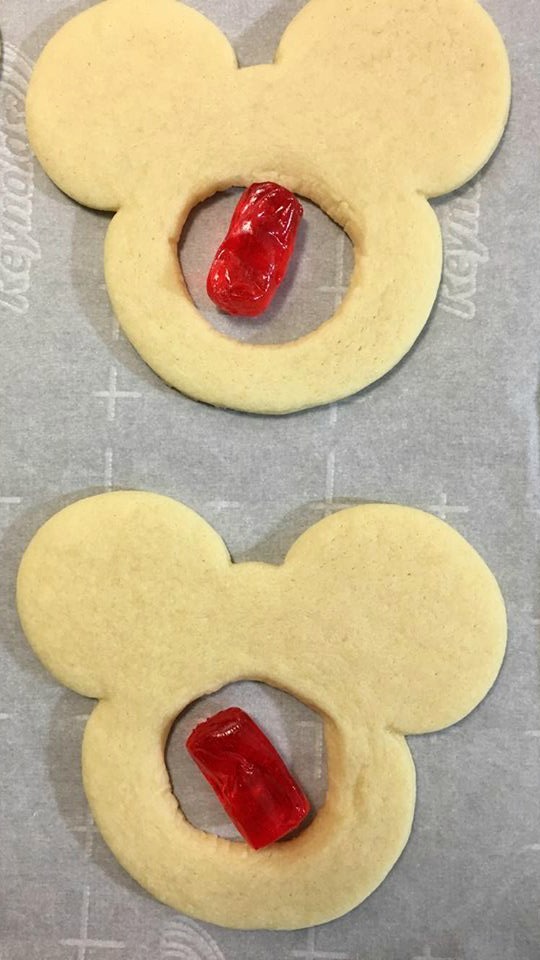
-While the cookies are baking, unwrap the candies from the wrappers and set aside.
-When the timer goes off, pull the cookies out and place 1 candy in the open circle of the cookie.
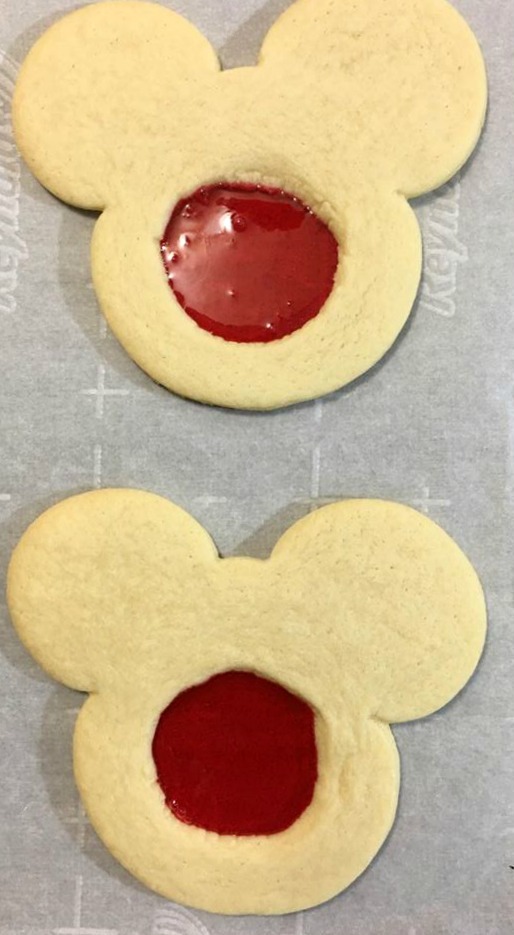
-Place back into the oven for another 3-4 minutes, or until you see the candy melted (wont take longer then 4 minutes)
-let cookies cool on cookie sheet for 30 minutes before moving the cookies.
Icing Ingredients:
2 egg whites
1 C powder sugar
1/2 tsp cream of tartar
1 tsp vanilla
2 piping bag with a number 2 tip
2 bowl to thin the icing
2 squeeze bottles
Icing colors needed:
Super Red
Black
Icing Directions:
Combine all ingredients into a stand up mixing bowl
If the icing looks a little soupy add in 1/2 C powder sugar
mix on medium speed until stiff peaks form, about 5 minutes
Split the icing into two bowls
Add a few drops of Super Red food dye into 1 bowl
If you dont like the shade of the color, add 1-2 more drops
Add a few drops of black into the second bowl
Scoop some of the icing into the two piping bags
Using the remaining icing in the bowls, add 2 TBSP water into the bowls to thin out the icing.
Pour the thinned icing into the squeeze bottles.
Decorating Directions
Take your cooled stained glass cookies and set them onto the cookie sheet
Add a few sprinkles into the “glass” part of the bottom cookie
Take one of your piping bags and pipe on a line around the cookie part of the bottom cookie
Place another cookie on top of the bottom cookie so that the icing becomes a “glue”
Let cookie sit for 30 minutes before decorating the top
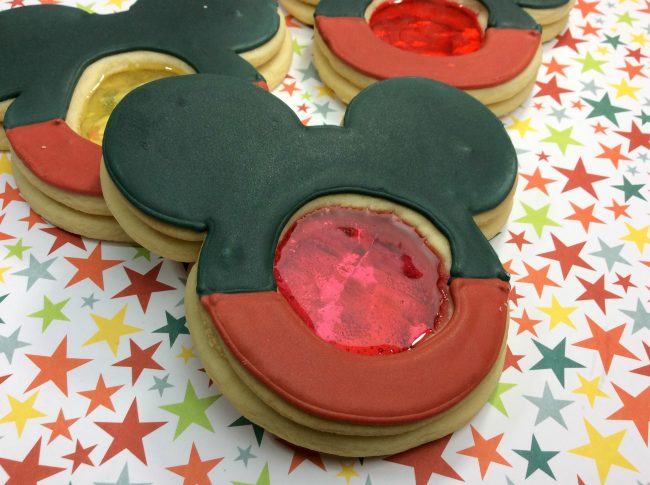
Take the black piping bag and pipe a line around the top half of the cookie for the head
Using the red icing, pipe the bottom half of the cookie
Fill in the colors with the matching thinned icing colors
Let cookies dry for 2 hours before enjoying!
Mickey Mouse Stained Glass Cookies Recipe
Ingredients
- Cookie Ingredients:
- 3 C flour
- 1 tsp baking soda
- 1/2 tsp salt
- 1 C soft unsalted butter
- 1 C granulated sugar
- 1 eggs
- 1 tsp vanilla
- 1 bag of Jolly Ranchers separating the red and yellow to use in the cookies
- 1 tablespoon to use to outline the opening circle
- Patriotic star sprinkles
- Cookie Cutter: mickey mouse head
- Icing Ingredients:
- 2 egg whites
- 1 C powder sugar
- 1/2 tsp cream of tartar
- 1 tsp vanilla
- 2 piping bag with a number 2 tip
- 2 bowl to thin the icing
- 2 squeeze bottles
- Icing colors needed:
- Super Red
- Black
Instructions
- Cookie Directions:
- - Cream the soft butter with the sugar until the combination is smooth not grainy to the touch in a mixing bowl.
- -Add eggs...Continue to mix.
- -Add the vanilla.. Continue mixing.
- -Sift the four, baking soda, and salt together.
- -Add the dry mixture to the wet mixture.
- -Continue mixing to make sure all ingredients are thoroughly blended.
- -Make the dough into a ball, wrap it in cling wrap completely covering the entire dough ball.
- -Put in the refrigerator for about 6 hours or overnight. Check to see if the dough is firm.
- -Preheat oven to 325 degrees.
- -Pull the cookie dough out of the refrigerator and sit it out to soften up a bit.
- - Put flour out on the cutting board, rub flour on the rolling pin, and work some flour into
- the batter. (if needed).
- -Roll the dough out on the cutting board and using the cookie cutter begin to make your cookies.
- -Line the cookie sheet with parchment paper.
- -Using a metal spatula move the cut cookies to the parchment lined cookiesheet.
- -Take a 1 TBSP and use it to get your outline of the center circle.
- -cut out the circle.
- -Place the cookies on the baking sheet and bake at 325 degrees for 6 minutes.
- -While the cookies are baking, unwrap the candies from the wrappers and set aside.
- -When the timer goes off, pull the cookies out and place 1 candy in the open circle of the cookie.
- -Place back into the oven for another 3-4 minutes, or until you see the candy melted (wont take longer then 4 minutes)
- -let cookies cool on cookie sheet for 30 minutes before moving the cookies
- Icing Directions:
- Combine all ingredients into a stand up mixing bowl
- If the icing looks a little soupy add in 1/2 C powder sugar
- mix on medium speed until stiff peaks form, about 5 minutes
- Split the icing into two bowls
- Add a few drops of Super Red food dye into 1 bowl
- If you dont like the shade of the color, add 1-2 more drops
- Add a few drops of black into the second bowl
- Scoop some of the icing into the two piping bags
- Using the remaining icing in the bowls, add 2 TBSP water into the bowls to thin out the icing.
- Pour the thinned icing into the squeeze bottles.
- Decorating Directions
- Take your cooled stained glass cookies and set them onto the cookie sheet
- Add a few sprinkles into the "glass" part of the bottom cookie
- Take one of your piping bags and pipe on a line around the cookie part of the bottom cookie
- Place another cookie on top of the bottom cookie so that the icing becomes a "glue"
- Let cookie sit for 30 minutes before decorating the top
- Take the black piping bag and pipe a line around the top half of the cookie for the head
- Using the red icing, pipe the bottom half of the cookie
- Fill in the colors with the matching thinned icing colors
- Let cookies dry for 2 hours before enjoying!
This is an awesome stained glass cookie.
Those are adorable! What a good idea with melting the Jolly Rancher in the middle!
I have never seen a cookie like this before! YUM 🙂
These are so cute and they look like the taste good too.
These Mickey Mouse Stained glass cookies are so pretty and a fun cookie to make with the kids. I will have to make these.
These cookies are really cute! I might have to try making these.
They came out so beautifully. Very classy.
Such a cute and yummy cookie! I love Jolly Ranchers too!
These are the cutest cookies! My youngest son loves Mickey Mouse so these would be a lot of fun for him and I to make together! Thank you for sharing!
This is such a cute idea. I love everything disney. I can’t wait to make these.
They looks so beautiful. Just more work than I’m willing to do.
I can just see the Pinterest FAIL that I would make with these.
These are so cute & look yummy! I’ll have to try them.
I’ve never seen a “stained glass” cookie! very cool
These are adorable! Who knew you could make such fancy cookies so easily?
This looks absolutely amazing. My son Loves Mickey Mouse wold definitely love to try to make these for his birthday party coming up next month
These are adorable cool idea
These are so cute! I am totally making these for Charlie soon!
These are ADORABLE and I love the jolly rancher in the middle to give it that stained glass look. Never seen cookies made this way before. I know my daughters would not only think their yummy but they would love the way they look
I love Mickey – so cute~
I love the look of these cookies. They would be so much fun to make with the grandkids.
They are so cute! My kids would love them.
These look like so much fun! What a neat idea. Thanks for providing detailed instructions for how to make the cookies.
These Mickey Mouse cookies are too cute.
Let’s see… If I had an extra week around the holidays I could do this. … nope.
omg i love the way these look. so cute but so fancy/
These are neat, would be a favorite among the kids.
These nice Mickey Mouse Stained Glass Cookies look so delicious. What a flashback, I can barely wait to try this nice recipe out.
Mickey Mouse is everything to my 2 year old daughter. These cookies look incredible and so professional. If I made these for my little girl, she would be sooo happy! I will need to try it! 🙂
Those are super cute and look delicious too!